Pages
& Links
Gallery
Pictures
QFH
Antenna
Contact
Details
Visitors

|
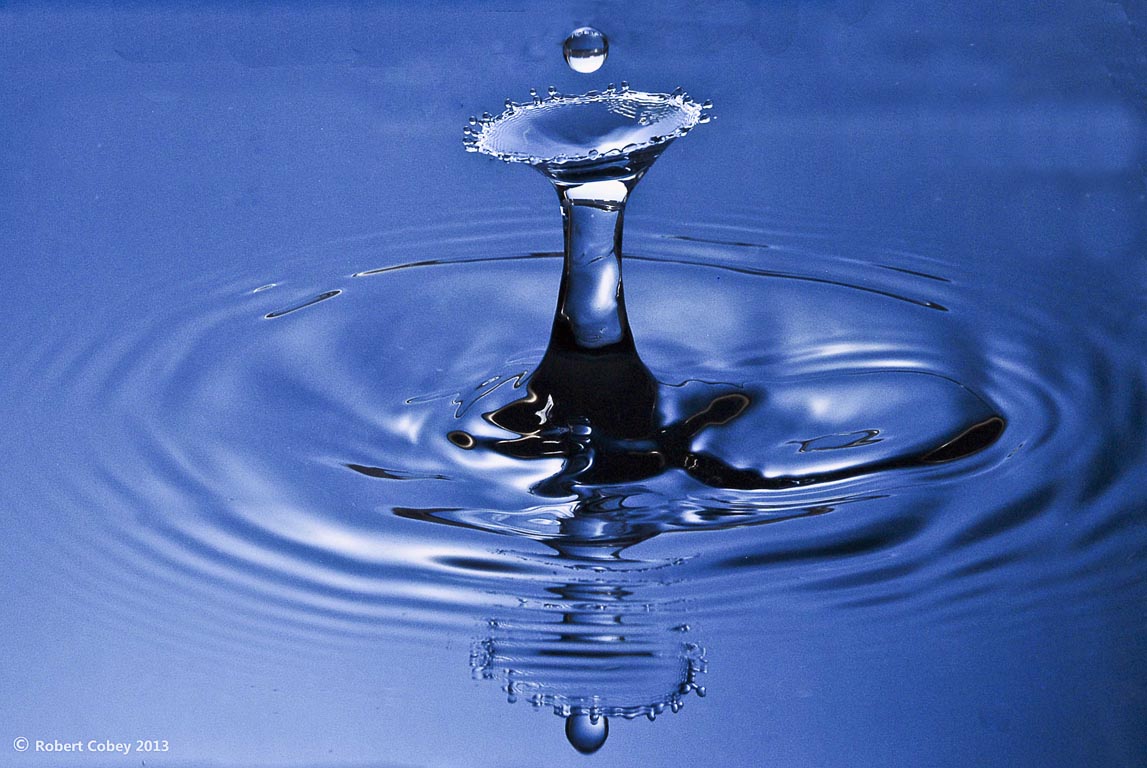
Welcome to my Waterdrop Photography page
I have been interested in all kinds of photography for over 60 years when many
of you reading this will not remember when we only had a camera called the Box
Brownie and the like.
Over the years I possessed various different cameras gradually improving in
quality as the years passed by.
I covered many varied subjects and was for 10 years employed taking
professional photographs of many Crime and Traffic subject matters whilst
employed as a Scenes Of Crime Officer. As you can imagine this was a very
challenging
job and was sometimes very gory and emotional but the photographs had to be
taken for their evidential purpose.
When I retired in 1994, my interest in photography remained and is now my hobby
together with that of Computing which take up most of my leisure time.
About a couple of years ago, I wanted a new challenge on the subject of
photography that being the high speed variety where, I could capture relatively
fast moving objects like the splash patterns formed by water drops or instances
of collisions or explosions similar to that of
a bursting balloon or shot from an airgun.
I set about searching the Web and found many interesting articles on the
subject with examples of how to do it for which I thank their respective
authors.
Having had an interest in electronics since my childhood, I built some simple
equipment that allowed me to take some of my first pictures of water drops and
bursting balloons. This gave me great satisfaction albeit they were of a very
simple nature.
About a year ago I came across an article called PHOTODUINO by Kalanda and I
tried out his Arduino based firmware together with one of his designed shields.
I had good success with this project but some how needed more and set about
designing my own PCB to go with his Java Controlled version Photoduino 1.1.
some of the results of which are included in my photogallery.
Deciding I wanted to progress further and control additional solenoid valves, I
discussed the matter with a very good friend of mine, Bob Freeth, an author of
amateur radio programs.

Together we decided to write a program for the Windows Operating System
whereby the timings could be easily changed in 1 millisecond intervals and
named it 'DROPDUINO'.
It is a program for controlling solenoid valves
together with firmware for the Arduino microprocessor which is used to control
the drop size and timing of up to 3 drops to each of 3 solenoids for the
purposes of liquid drop photography.
The values for drop size, drop delay etc.
are all received from a controlling PC through the USB port. All times
received from the controlling PC are in milliseconds. After reading and
processing a command from the PC a response is given to indicate the success or
failure of the command.
A dedicated shield was designed for controlling the valves, camera and flash,
pictures of which are included on this website.
It wasn't long before repeatable pictures were able
to be taken and the details of each sequence written to file for later
reference or repetition or further experimentation.
Below is a screen capture of the Dropduino program showing the editable timing
grid and associated controls. The program can control up to 3 solenoid valves,
producing 1 drop from each or 2 drops from 1 and 1 drop from another or 3
drops from a single solenoid allowing various colours or liquids to be used.
Another enhancement in this program compared with some others is that it
allows you to set and lock the Flash Set off time so that if the drop size or
duration times are changed then the flash time will be adjusted
accordingly which makes the setup procedure for a successful picture far
quicker and easier.
It is also possible to flush each individual solenoid resevoir either to change
the liquid type consistancy or the colour.
A dedicated Arduino shield has been designed for this project pictures of which
are included but are not to scale. All outputs are optically isolated giving a
good deal of protection to the Arduino board.
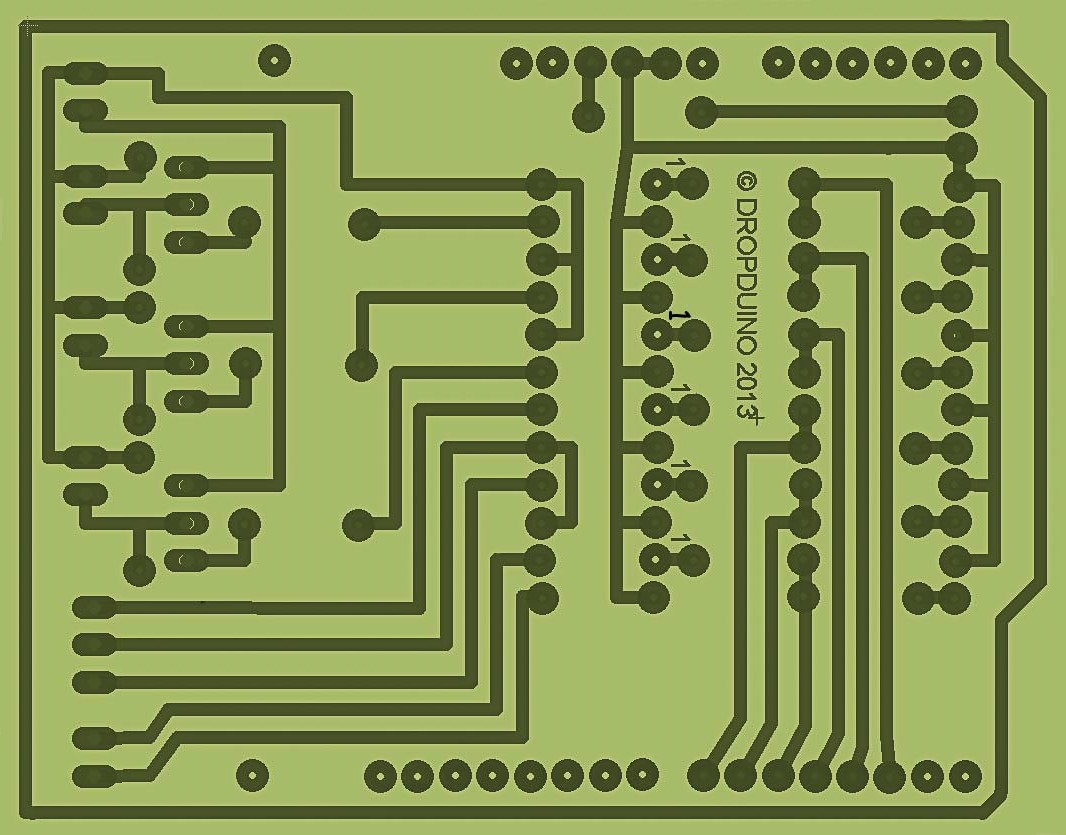
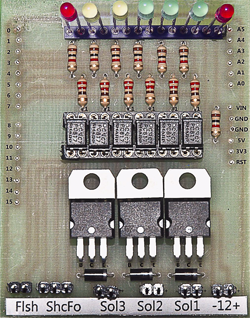 Each of the digital output pins in monitored by an LED to indicate the system
is functioning which also aids the setup and testing of the system. The board
as you will see is of single sided fibreglass construction which was produced
using the iron on method with the circuit printed on a laser printer on to
shiny paper then later
etched, drilled and populated. Details of this method of production can readily
be found on the web. If at a later stage I find that I have sufficient
enquiries with regard to this project then it is possible that I will get some
quotes to have a batch of printed circuit boards professionally made and drilled
which I can then hopefully supply and sell at a modest fee to cover any costs
and postal
charges.
Each of the digital output pins in monitored by an LED to indicate the system
is functioning which also aids the setup and testing of the system. The board
as you will see is of single sided fibreglass construction which was produced
using the iron on method with the circuit printed on a laser printer on to
shiny paper then later
etched, drilled and populated. Details of this method of production can readily
be found on the web. If at a later stage I find that I have sufficient
enquiries with regard to this project then it is possible that I will get some
quotes to have a batch of printed circuit boards professionally made and drilled
which I can then hopefully supply and sell at a modest fee to cover any costs
and postal
charges.
I hope you have found this page of some interest regarding Liquid Drop
Photography, if you wish to make comment or contact me then please do so by
clicking on
the link in the left hand column.
|